How To: Tarp a Roof: A Guide from Ernie’s Roofing in Denver
Learn efficient roof tarping techniques from Ernie’s Roofing, a trusted contractor in Denver since 1978. Discover how to handle insurance claims, roof replacements, and seamless gutters while maximizing efficiency and minimizing costs. Get expert tips and examples in this comprehensive guide.
Hey there, friend! Welcome to Ernie’s Roofing blog, where we’ve been dishing out roofing wisdom since 1978. Today, I’m excited to share some insider tips on a crucial aspect of roofing: tarping a roof efficiently.
As a licensed roofing contractor with decades of experience, I’ve seen it all – from minor repairs to complete roof replacements. And let me tell you, knowing how to properly tarp a roof can be a game-changer, especially when it comes to insurance claims and keeping your home safe and dry.
So, grab a cup of coffee, sit back, and let’s dive into the world of efficient roof tarping!
Importance of Efficient Roof Tarping
Imagine this scenario: a fierce storm rolls through your neighborhood, leaving behind a trail of damage. Your roof has taken a beating, with shingles ripped off and water seeping into your home. In times like these, having a solid tarping strategy can make all the difference.
Efficient roof tarping not only prevents further damage to your home but also streamlines the repair process. By properly tarping your roof, you can minimize water infiltration, protect your belongings, and expedite the insurance claim process.
Key Steps for Efficient Roof Tarp
1. Assess the Damage
Before you bust out the tarps, take a close look at the damage. Identify the affected area and determine the extent of the repairs needed. This will help you select the right size tarp and plan your strategy accordingly.
2. Choose the Right Size Tarp a Roof
Contrary to popular belief, bigger isn’t always better when it comes to tarps. Opt for a tarp that covers the damaged area only without excess material. This not only saves you money but also ensures a snug fit that prevents water from seeping in.
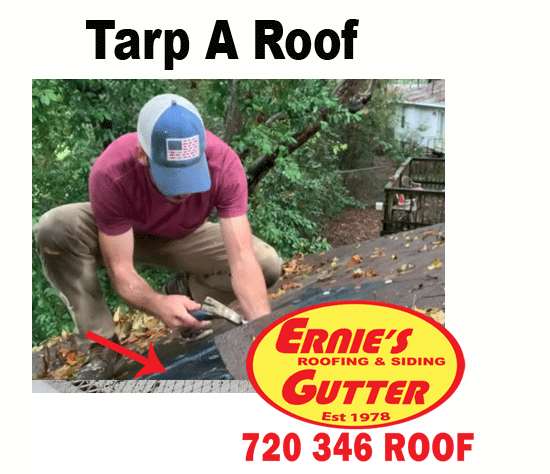
3. Lift Shingles Carefully
To tarp a roof effectively, you’ll need to lift the surrounding shingles without causing damage. Use a trowel or putty knife to gently pry up the shingles, creating a space to slide the tarp underneath.
4. Position the Tarp Correctly
Once you’ve lifted the shingles, carefully slide the tarp underneath, ensuring it covers the damaged area completely. Be sure to tuck the edges of the tarp under the lifted shingles to create a watertight seal.
5. Secure the Tarp
To keep the tarp in place, use cap nails to secure it to the roof deck. Place nails strategically to minimize damage to the shingles and ensure a secure fit. Additionally, consider using two-by-fours or one-by-sixes in high-wind areas for added stability.
6. Trim Excess Material
Once the tarp is secure, trim any excess material to prevent hazards and ensure easy access for adjusters or contractors. A neat and tidy tarp not only looks better but also improves functionality.
7. Monitor the Situation
Remember, a tarp is a temporary solution. Keep an eye on the weather and schedule repairs as soon as possible to prevent further damage to your roof and home.
FAQ: Your Top 10 Questions Answered
1. How long can a tarp stay on a roof?
A tarp is a temporary solution and should only be used until permanent repairs can be made. Depending on weather conditions, a tarp can typically last anywhere from a few weeks to a few months.
2. Will my insurance cover roof tarping?
Many homeowner’s insurance policies cover roof tarping as part of the overall repair process. However, coverage may vary depending on the cause of the damage and your specific policy terms. It’s always best to check with your insurance provider to confirm coverage.
3. Can I tarp my roof myself?
While tarping a roof may seem straightforward, it’s best left to the professionals. Improper installation can lead to further damage and safety hazards. Always consult with a licensed roofing contractor for assistance.
4. How do I know if my roof needs tarping?
If your roof has sustained damage from severe weather, such as missing shingles or leaks, it may be necessary to tarp the affected area. A thorough inspection by a licensed roofing contractor can help determine the extent of the damage and the best course of action.
5. What size tarp do I need?
The size of the tarp you’ll need depends on the extent of the damage to your roof. Measure the affected area and select a tarp that provides adequate coverage without excess material.
6. Can I reuse a tarp?
In most cases, tarps are single-use and should be replaced after they’ve been removed. Reusing a tarp can compromise its effectiveness and lead to further damage to your roof.
7. How do I secure a tarp in high winds?
In areas prone to high winds, consider using additional support, such as two-by-fours or one-by-sixes, to secure the tarp to the roof. Additionally, ensure that cap nails are placed strategically to prevent the tarp from being lifted by strong gusts.
8. Will tarping my roof affect my insurance claim?
Tarping your roof can help mitigate further damage and expedite the insurance claims process. Be sure to document the damage and keep receipts for any repairs or materials purchased.
9. How much does roof tarping cost?
The cost of roof tarping can vary depending on the size of the affected area, the type of materials used, and the contractor’s fees. It’s best to obtain quotes from multiple contractors to ensure you’re getting a fair price.
10. Can I install seamless gutters while my roof is tarped?
Yes, you can typically install seamless gutters while your roof is tarped. However, it’s essential to work with a licensed roofing contractor who can coordinate the installation to ensure a seamless process.
Wrapping Up
And there you have it – everything you need to know about efficient roof tarping! By following these tips and consulting with a licensed roofing contractor, you can protect your home from further damage and get back to enjoying peace of mind.
If you have any more questions or need assistance with your roofing needs, don’t hesitate to reach out to us at Ernie’s Roofing. We’re here to help!
Until next time, stay safe and dry!